Gluten-Free Butternut Squash Ravioli
Gluten-free butternut squash ravioli filled with the flavors of fall. This comforting, seasonal dish celebrates the art of pasta-making and is crafted for everyone to enjoy.
- Yield: 4 Servings
- Prep Time: 1 hr 45 min
- Cook Time: 15 min


Ingredients
Caputo Gluten-Free Laminated Pasta Dough
4 Large Eggs
1 Teaspoon Salt
4 Tablespoons Water
Butternut Squash Filling
1 Whole Butternut Squash (700g)
1 and 1/4 Cup Parmigiano Reggiano, grated
1 Egg Yolk
1/2 Tablespoon Fresh Sage, minced
1/4 Teaspoon Fresh Nutmeg, grated
2 Tablespoons Kosher Salt
2 Teaspoons Fresh Cracked Pepper
(Optional) Brown Butter Sage Sauce
1 stick of salted butter (1/2 Cup), room temperature
8-10 fresh sage leaves
Optional Topping: 2 oz Pancetta, diced
Instructions
Preparing Filling
- Preheat your oven to 400°F (200°C).
- Cut the butternut squash in half lengthwise and scoop out the seeds.
- Lightly coat the squash halves with Olitalia Extra Virgin Olive Oil. Season with salt and pepper. Place cut side up, on a baking sheet.
- Roast in the oven for 45 minutes to 1 hour, or until the squash is tender and can be easily pierced with a knife.
- Once tender, remove the squash from the oven and let it cool for 10-15 minutes.
- Peel off the skin and transfer the flesh to a food processor. Blend the squash until smooth.
- Transfer the purée to a large mixing bowl. Add the Parmigiano Reggiano, egg yolk, sage, nutmeg, kosher salt, and pepper.
- Stir until well combined.
- Cover the mixture and refrigerate.
- Cool for at least 1 hour or store in the fridge for up to 3 days.
Assembling the Ravioli
- While your filling cools, prepare your Caputo Gluten-Free Laminated Pasta Dough.
- Combine the Caputo Gluten Free Flour and salt in a mixing bowl and mix to evenly distribute the salt throughout the flour.
- Make a small well in the middle of your flour and add your eggs.
- Break the eggs with your fork and gradually incorporate the flour into the eggs.
- Add 1 tablespoon of water at a time as you work the dough together. If the dough becomes too wet, add a little more flour to your hands to prevent sticking and dry out the dough slightly.
- The dough should come together and have a smooth surface. This can take 5 minutes.
- Wrap the dough in plastic wrap and place it in the fridge until ready to use. This can be made up to 3 days in advance.
Rolling and Shaping Ravioli
- When ready to assemble, begin rolling out gluten-free pasta dough with a sheeter or rolling pin to about 1/8 inch thick. The ideal sheet size is 4x12 inches. While rolling, keep the completed sheets covered with plastic wrap to prevent drying out.
- The first few rolls may cause the dough to break. Simply place the dough on the counter, form it back into a rectangle, and run it through the sheeter/rolling pin again until it holds its shape.
- Once your sheets are rolled, remove the filling from the refrigerator and place it into a piping or plastic bag.
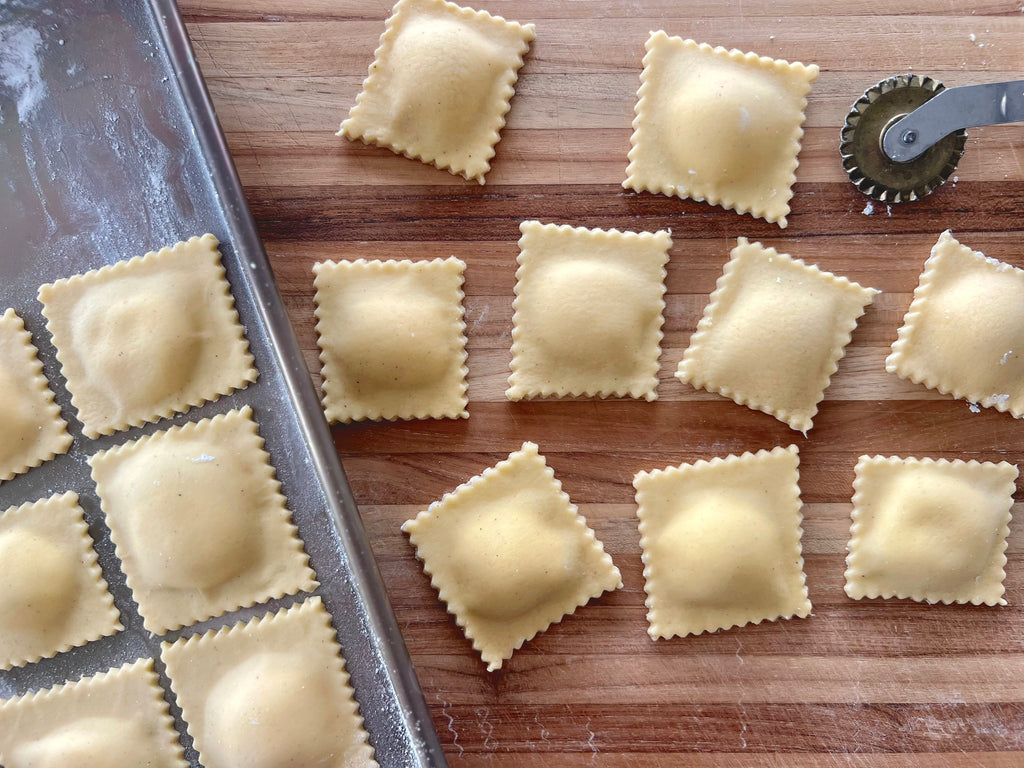
- Snip the edge of your plastic or pastry bag and pipe a dollop of butternut squash filling spaced 2 inches apart across the sheet of dough. Once the filling is placed, cover with another thin sheet of dough. Press around each dollop to remove the air and seal the sheets together.
- Use a ravioli cutter or knife to cut the ravioli into the desired size and shape.
- Place the completed ravioli aside and keep covered in plastic while finishing the rest. Ensure each ravioli is well sealed to prevent breakage during cooking (you can use a little water to help seal if the dough starts drying out).
- The ravioli can be cooked immediately or frozen in a freezer-safe bag for up to 3 months.
Brown Butter Sage Sauce
- In a medium saucepan, melt 1 stick (1/2 cup) of butter over medium heat.
- Once the butter is melted and starts to foam, stir continuously. Continue to cook until the butter turns a golden brown color and has a nutty aroma.
- Add a few fresh sage leaves to the browned butter and cook for an additional 1-2 minutes, allowing the sage to infuse its flavor. Be careful not to let the butter burn; you want it to be golden brown, not blackened.
Finishing the Dish
- Once your ravioli is cooked and drained, toss it gently with the brown butter sage sauce.
- We recommend serving the ravioli with the crispy pancetta!
- Enjoy!


